Care
Clothing care tips to make your wardrobe last

This article will delve into the distinctions between dryer balls and dryer sheets, elucidating the unique characteristics of each and outlining their respective advantages and disadvantages. By providing this information, readers can make informed decisions tailored to their specific laundry needs.
Introduction
Everyone loves the satisfaction of pulling warm and dry clothes out of the laundry. While getting clothes dry is one of the perks of good laundry practices, there is a longstanding debate that revolves around which is the better method of drying clothes: using dryer sheets or dryer balls.
Let's look into the advantages and disadvantages of dryer sheets versus dryer balls, discuss the unique characteristics of each, and let you decide which is better for you to prevent your clothes from sticking together.
What Are Dryer Sheets?
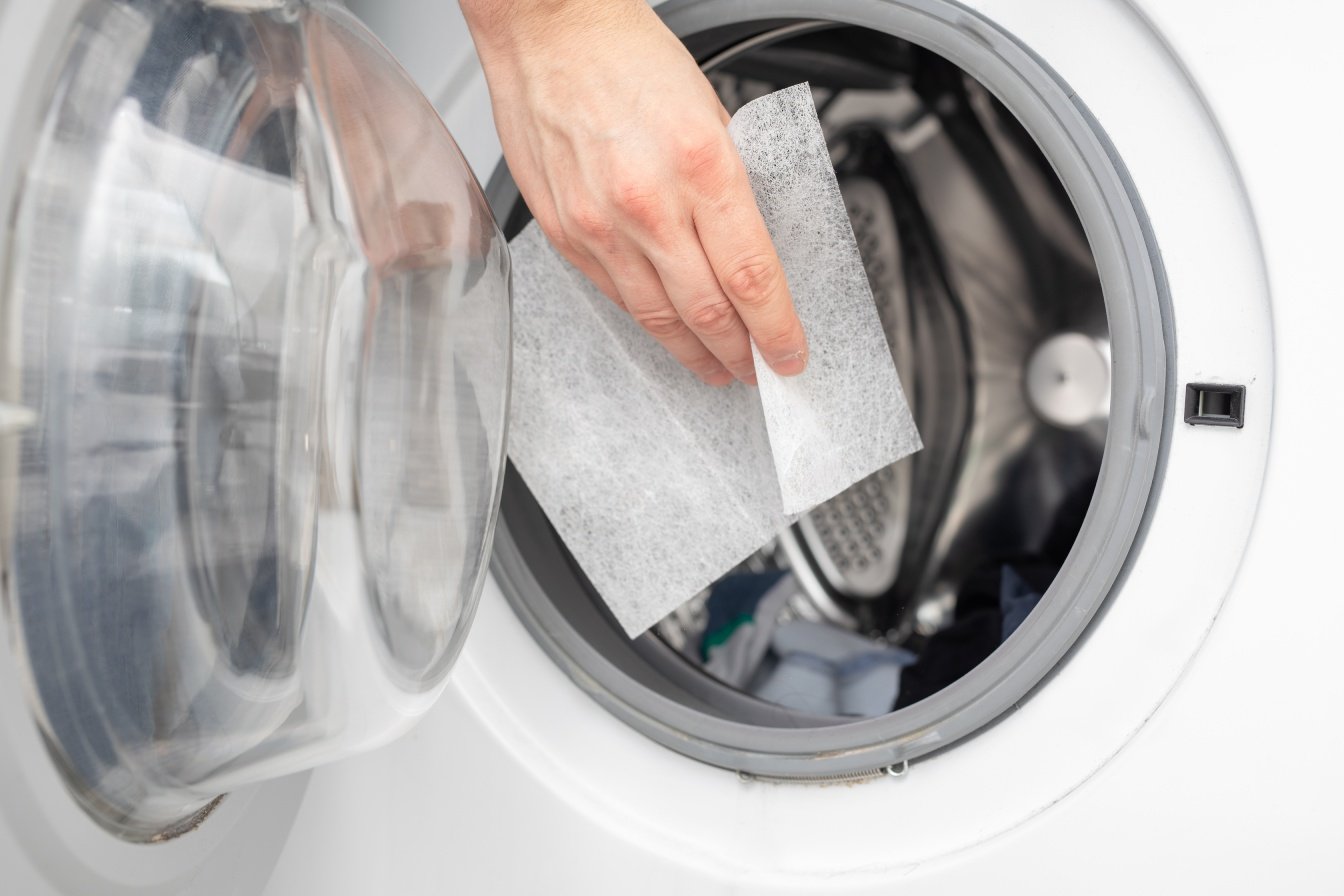
Dryer sheets are rectangular sheets made of polyester or fiber cellulose with a layer of fragrance, softeners, and lubricants. The hot air, humidity, and friction created during the drying cycle serve to release these compounds onto the fabrics, producing a long-lasting scent while softening clothes and reducing or eliminating static cling.
Dryer sheets also help prevent overdrying and add fragrance to them. One dryer sheet is good enough for a medium-sized wash load while two sheets are recommended for larger loads.
Pros and Cons of Dryer Sheets
The use of dryer sheets is common in many homes for the laundry drying process. Below we discuss some advantages and disadvantages of using dryer sheets:
Pros
-
Softening Agent: These sheets can soften your clothes because of the fabric conditioner that is infused in them.
-
Added Fragrance: Dryer sheets are infused with light fragrances, which give a fresh smell to your clothes. Many people who want their clothes softer and to smell nice love using dryer sheets.
-
Ease of Usage: Dryer sheets come in predetermined sizes, making them easier to use. You can decide how many to use with your washing load. Dryer sheets can be more affordable if purchased in bulk.
Cons
-
Toxic Chemicals: Some dryer sheets contain toxic chemicals that can be dangerous and can even cause people to have respiratory reactions, particularly those with asthma.
-
Potential Allergic Reactions: The toxic chemicals in dryer sheets are a health hazard because they can cause skin irritation for people who have sensitive skin.
-
Single Use Only: A big disadvantage of dryer sheets is that they can only be used once, after which they have to be thrown away. This is not very environmentally friendly (although biodegradable sheets are available).
-
Does Not Reduce Drying Time: The use of dryer sheets keeps drying time the same, unlike when using a wool ball.
-
Reduces Absorbency: Dryer sheets can make items like towels less absorbent over time.
What Are Dryer Balls?
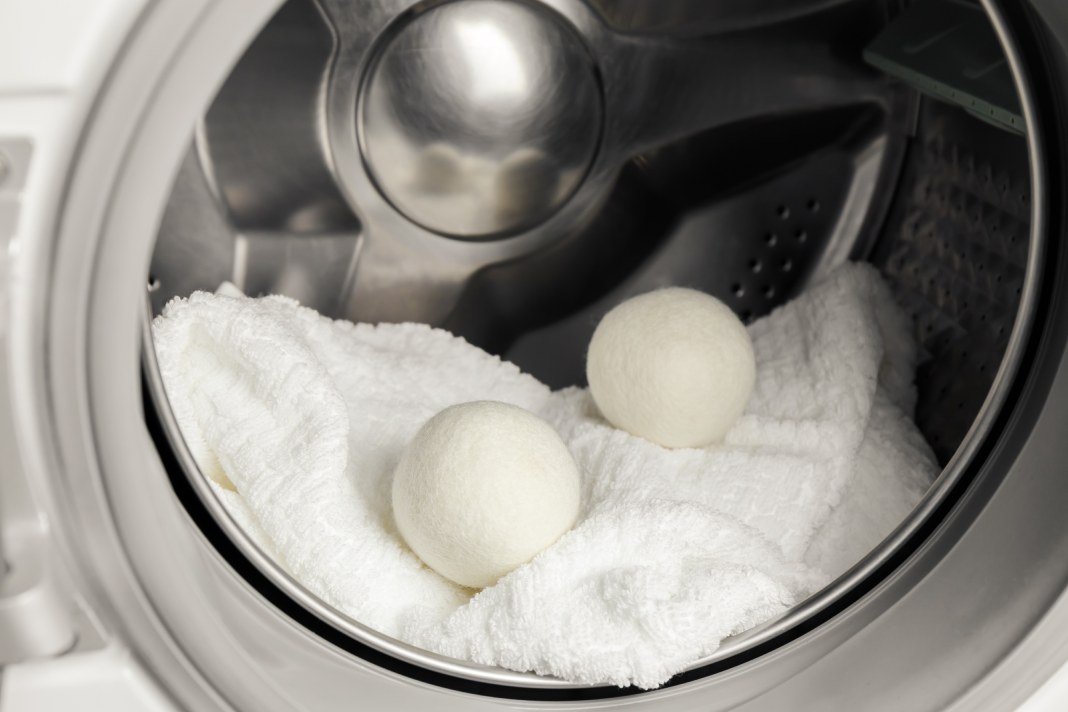
Dryer balls are laundry balls that are usually made of wool, plastic, or polyester fiber. They are the size of a tennis ball and work in the process of drying by tumbling between layers and separating items.
This allows better circulation of warm air which also cuts drying time. The use of dryer balls prevents clothing fabrics from getting wrinkles, softens clothes, and prevents static.
Pros and Cons of Dryer Balls
Some people prefer using dryer balls instead of dryer sheets in the drying process. Some of the main reasons for using a dryer ball are:
Pros
-
Natural Softening: Dryer balls naturally provide fluffing and softening to clothes. They prevent static cling and reduce the chance of wrinkles on fabrics.
-
Reusable and Eco-Friendly: Wool dryer balls can be reused 1,000 times in the laundry drying process. This makes them extremely cost-effective. Since they are made of natural substances, it makes these dryer balls environmentally friendly as well.
-
No Health Risks: Since dryer balls do not contain any toxic substances, they pose no health risks for those suffering from asthma, sensitive skin, and other allergies. In addition, they do not release any harmful substances into the air.
-
Saves on Drying Time: It is estimated that the use of dryer balls reduces the time it takes for clothes to dry by 25%.
-
Saves on Costs: The reduced drying time needed when you use dryer balls can help you save hundreds of dollars in electricity costs over time.
Cons
While using dryer balls has several benefits, there are some cons to look at as well. Some of these disadvantages are:
-
Noise in the Dryer: Dryer balls are known to make a lot of noise while they bounce around in the dryer chamber. This can be a source of concern for some people.
-
Lack of Fragrance: Traditional dryer balls are made from natural substances. They do not have any fragrances or essential oils included with them. However, you can apply fresh scents of your liking.
-
Can Create a Mess: There is a danger that wool dryer balls may unravel in the dryer during the laundry cycle. If this happens, it will create little bits of lint that may be difficult to clean up. In the long run, it will cause the machine to become clogged if left unchecked.
Main Differences: Dryer Balls vs. Dryer Sheets
If you are still confused about whether using dryer sheets or dryer balls to make your clothes dry would be a better option, we will reiterate the main differences once more.
Composition and Material
-
Dryer Sheets: Most are made from polyester coated with a softening agent like fatty acids and fatty alcohols.
-
Dryer Balls: Are unscented and are typically manufactured out of felted wool, rubber, or plastic.
Fabric Softening Method
-
Dryer Sheets: The friction of the machine releases the fatty acid from dryer sheets, allowing them to soften the fabric and prevent static cling.
-
Dryer Balls: Soften fabrics without the use of chemicals. As the clothes tumble in the dryer, the dryer balls bounce around, fluffing and agitating the clothes fibers. This loosens the fibers and increases the airflow, causing the clothes to dry in the clothes dryer.
Longevity and Reusability
-
Dryer Sheets: Can be used only once. After this, they have to be thrown away. This can result in considerable costs if you do laundry frequently.
-
Dryer Balls: Can be used many times. Wool-based dryer balls can be used 1,000 times, making them much more cost-effective.
Effectiveness in Reducing Static
-
Dryer Sheets: Stop static cling by absorbing static electricity formed by different fabrics during your dryer cycle. The fabric softeners that coat dryer sheets have positively charged ions to balance the negative ions that cause static cling. This leaves you with static-free soft clothes.
-
Dryer Balls: Stop static cling by creating gentle friction and causing fabrics to separate. This prevents them from sticking to each other and causing static electricity.
Keep Your Clothes Soft and Fresh with Rinse
Now that you are better informed about the pros and cons of using dryer sheets and dryer balls, we hope that you can make a better decision on which is better for your laundry.
Alternatively, using a professional laundry service like Rinse will help you get your clothes cleaned efficiently without the need for complex decisions. We have been doing laundry at the highest standard for more than a decade – trust us we know the best practices to dry clothes.
Our services include wash and fold, hang dry, and dry cleaning. Not only that, but we offer the ultimate convenience through our pickup and delivery service. Simply schedule a pickup by contacting us today via text, our app, or our website, and leave the rest to us.
Contact us at Rinse today to see our skill in action.

This article aims to elucidate the duration for which clothing can remain in the washer and furnish readers with indicators to discern when their garments have been left unattended for an extended period. Additionally, it will offer valuable insights into preventing unpleasant odors in clothes and effectively removing soil buildup.
Introduction
Have you ever washed clothes and left them in the washer or dryer, forgetting to remove them for several hours or even overnight? Don't worry, you are not alone. Many of us have wondered if the clothes then need a rewash, or if are they okay to dry out and put the episode behind us.
The main issue caused by leaving wet clothing in the washing machine or dryer is that the clothes will tend to smell. They may even develop mildew or mold that has to be washed away. This article will discuss how long it is safe to keep your washed clothes in the washer without the need to rewash them.

How Long Can You Leave Laundry in the Washer?
Research has indicated that the maximum length of time that you can leave your clothes in the washer is from 8 to 12 hours. This prevents the clothes from developing unpleasant odors or mildew. Even house expert Martha Stewart states that there are no adverse effects if the clothes are left overnight in the washer or dryer.
The best way to determine whether the clothes are okay is to smell them. If the clothes do not have an unpleasant odor, they are fine to put out to dry. It is recommended to dry them outdoors rather than use a dryer – heat and sunlight can dry the clothes more effectively and destroy bacteria, as compared to using a dryer.
Other factors that impact how long you can leave damp clothes in the washing machine include the temperature of the water during the wash, the type of detergent used, and the type of fabrics that were being washed.
Furthermore, if you regularly clean out your washing machine with white vinegar, then you'll be able to leave your wet clothes there for a bit longer. Similarly, using bleach will extend the time that you can keep your towels, coats, and jackets in the washing machine without them smelling. Clothes made of cotton, linen, silk, and polyester are more prone to developing bad smells if kept in the washer for too long.

3 Signs You May Have Left Your Clothes in the Washer for Too Long
Several signs tell you if you have left your clothes in the washer too long. Below, we discuss three factors.
Musty or Mildew Odor
Mildew is a type of fungi or bacteria that grows in a humid and dark environment and causes an unpleasant smell. Mildew feeds on the dirt in your washing machine and appears as a black, grey, or yellowish growth on damp clothes.
Mildew not only causes an unpleasant stink in your dried clothes but could also result in considerable damage to your clothing fabrics. It is important to remove mildewy clothes from your machine as soon as possible. Also, breathing the unpleasant musty odor can make people unwell, especially those with asthma.
Visible Mildew Spots
Leaving your clothes unattended for 24 hours is enough to build up mildew and moisture spots on your clothes. Mold is a white substance that develops on a garment sometime after it has mildew.
A Stale or Unpleasant Smell
The unpleasant musty smell of wet clothing in your washing machine could be due to mold or mildew. It could also result from soil and dirt in your washer or dryer – they need to be cleaned up regularly.

How to Remove Soil Build-Up
One of the reasons that clothes can develop an unpleasant odor if left in the washing machine for too long is because of soil buildup. This occurs when dirt, stains, oils, and lint are lodged in parts of the machine that are not easily reachable.
However, it is a good practice to clean out the machine regularly so that soil and dirt do not accumulate – doing this once a month should suffice.
If you have left clothes in the washer or dryer for several days, it can lead to soil buildup. But do not worry, there are several ways to address this problem.
Rewashing with Vinegar
White vinegar has excellent cleaning properties. To clean up the dampness in your machine if you suspect soil buildup, pour a cup of white vinegar into the machine and run the rinse cycle with the normal amount of water that you would use in a wash.
Set the water temperature to warm. When the cycle is complete, drain out the water and wipe the machine clean with a moisture-absorbent cloth. Keep the machine open to let it dry out and you're done.
Using Baking Soda
If you have no white vinegar on hand, you could alternatively use baking soda to clean out your washing machine and remove soil buildup. To do this, pour in a small packet of baking soda into the dispenser and then run the rinse cycle with warm water. This will also remove the effects of soil buildup in your washer or dryer. Remember to use an absorbent cloth to wipe off after it is done.
Using Bleach
Add half a cup of bleach to the dispenser of your washing machine and run the rinse cycle on a warm or hot setting. Then drain out the water after the rinse cycle is complete. Always remember to use protective gloves and ventilate the room before using bleach because it could be harsh and release toxic fumes.
If you are still worried about what will happen if you leave your moist clothes in the washer or dryer for too long, set a timer for this purpose. You could sync the timing of the laundry cycle with your mobile phone – just remember to take action as soon as the timer on your tumble dryer goes off.
In addition, do your laundry at the same time every week. Once you establish this proper routine, you will never have to worry about leaving your clothes in the machine during your laundry routine.

Keep Your Clothes Constantly Fresh with Rinse
Rinse is a professional laundry and dry cleaning service that can save you from worrying about whether you left your clothes in the washing machine for too long. Our services include wash and fold, dry clean, and hang dry.
You can trust us to do a flawless job with clothes that are delicate and expensive, and require professional handling – we understand the importance of well-laundered clothes. Once you try our services, you will find fresh and clean clothes delivered to your doorstep.
Just schedule a pickup via text, our website, or our app and a Valet will come by that same evening. You will never have to worry about clothes left in the washing machine again!
Contact us at Rinse today to see our skill in action.

This article will delve into the optimal frequency for washing comforters, shedding light on crucial factors readers should consider when making this decision. Additionally, it will differentiate between washing a new comforter versus an older one. The discussion will extend to include guidance on washing other bed garments and the recommended frequency for maintaining overall bedding hygiene.
Introduction
A comforter is a very essential piece of bedding that keeps us warm and cozy during the winter months. The weight and size of a comforter can be a factor that prevents us from wanting to wash it, yet it is necessary to keep your comforter clean because it can impact the quality of your sleep.
Most people prefer to wash it as sparingly as possible. This is especially true when they use flat sheets or duvet covers with their bedding. This article will cover how often you should wash your comforter and what factors should be considered when doing this.

What Factors Should I Consider When Washing a Comforter?
Generally speaking, you should wash a comforter every two to three months, in addition to a wash at the beginning and end of the winter season. A few other factors to consider are whether the comforter is old, the fabric it is made of, the number of people using the bed, and whether any of them have any allergies. Going further into the details:
-
Fabric Type: The most common materials used for comforters are cotton, wool, silk, and down (from a goose or duck). The best varieties are expensive – pay close attention to the care label to ensure you clean the material as directed.
-
Usage: How often you wash a comforter will also depend on the number of people using it and the number of hours it is used – think of it as the wear and tear it receives.
-
Allergies: Comforters that are made of materials that can cause allergies will need to be washed more frequently. Dyes, synthetic materials, and feathers are known to cause allergies in most people. The presence of dust mites, dead skin cells, and pet dander on the bed may also contribute to allergies.
-
Duvet Cover: Comforters that have a duvet cover will need to be washed less frequently than comforters that do not. This is because the duvet cover prevents the body from coming in direct contact with the comforter.
-
Bedding Material: If the bedding material needs frequent washing, you should include the comforter in the wash as well. Stains from oil, sweat, grease, and other materials will likely sully the bedding material and lead to having to wash the comforter as well.

How Often Should You Wash Your Comforter?
A new comforter should be washed as soon as it arrives from the store. This is because factories and stores are full of dust and other materials that can affect the cleanliness of the comforter. This is recommended even if the comforter comes in protective packaging.
If the comforter does not have a duvet cover, it should be washed once every three months. If it does, it can be washed less frequently, maybe once every three to six months. Scenarios that may require frequent washing include whether you have oily skin, use hair dyes, or suffer from allergies. If kids or pets share your sleeping space, there are dust mites or other allergens, you will have to wash your comforter more frequently, maybe once every two to three weeks, or use the services of a local laundromat.
When washing comforters that are made of synthetic material, you need to strictly follow the manufacturer's instructions, so make sure you read and follow these carefully. In particular, if the comforter is made of down, it will require a different way of washing.
However, to be safe, monthly washing of your comforter will prevent the accumulation of dirt and bacteria and have you sleeping more comfortably. Note that washing wool comforters can be tricky because they can shrink in the wash.
Steps to Wash and Dry a Synthetic Comforter
-
Set the washing machine temperature to either lukewarm to cold, as anything warmer could damage the comforter's fibers.
-
Use a small amount of laundry detergent. If you use too much, you could leave residue on the filling.
-
Wash the comforter on a delicate or gentle cycle with an extra rinse cycle if possible. Use a stain remover if needed.
-
After the cycles are complete, assess the comforter for dampness. If it is still sopping wet, put it back in the washing machine for another spin cycle to help reduce drying time.
-
Continue by loading the comforter in the dryer with four to five wool dryer balls (they are the size of tennis balls) on a low heat setting (which can take up to a few hours). Even if the comforter seems dry, it's better to over-dry the fabric, as wet filling could cause mold.
-
Check the comforter every 30 minutes to redistribute the filling and break up clumps until it is completely dry.
Steps to Wash and Dry a Down Comforter
-
Only wash down comforters with a front-loading washer. The jerking action of the agitator in a top-load washer may cause damage by packing the down. To hand wash down, place it in a bathtub filled with warm water and detergent.
-
Gently squeeze the soapy water through the down-filled item, then drain the wastewater.
-
If you have a front-loading washer, choose a cold temperature setting (it's the safest wash temperature since the fabric can shrink up to 10% in hot water).
-
Use the fastest spin speed to remove as much moisture as possible.
-
Add a laundry detergent of your choosing, and avoid using fabric softener, as this will coat the down and reduce its fluff.
-
Once the wash cycle is complete, run the dryer on air fluff or the lowest temperature possible since high heat can scorch down and damage the fabric.
-
Dry with two to three wool dryer balls for about three to four hours and check every 30 minutes to break up clumps and ensure the down is not too warm.

How Often Should Other Bedding Garments Be Washed?
In addition to comforters, there are several other bedroom items on top of the mattress that need washing, such as:
-
Pillowcases: Since oil and dirt from your hair and face rub naturally into the fibers of the pillowcase every night, it is suggested that you wash these every five to seven days. You may even want to wash them more frequently if you have acne or other allergies.
-
Sheets: Sheets like bed linen come in direct contact with anyone using the bed. It is suggested to wash bed sheets once every week to stop the accumulation of bacteria, dirt, dust mites, and other allergens on them. If you have pets or small children or live in a dusty or sandy locale, you will need to wash your sheets once in five days to stop germs. In addition, more frequent washing needs to occur when you are sick.
-
Duvets: You should wash your duvets once every few weeks. They do the job of protecting your comforter from dirt between washings.
Take Care Of Your Bedding with Rinse
Washing comforters, duvets, flat sheets, and other bedding items can take too much time and energy. If you have a small washing machine, it may struggle under the pressure.
Rinse is a professional dry cleaning service that can solve all these problems for you. We have the required commercial washers and expertise to make your bedding items clean and comfortable.
Regular laundering of bedding items will give you sound sleep at night and keep you healthy. Contact us via text, our website, or app to have one of our Valets come pick up and drop off your duvets, comforters, and sheets. We guarantee that you will love our services!
Contact us at Rinse today to see our skill in action.

This article will explore how to use a mesh laundry bag, why they are essential to protect clothes in the washer, and the different types of mesh bags available.
Introduction
Washing clothes is a task that needs to be handled carefully. This is because some clothes are made of delicate material, and exposing them directly to the washing machine can result in wear and tear that can reduce the life of clothes or even damage them beyond repair. Thankfully, we can use mesh laundry bags to protect these clothes during the cleaning process.
Mesh laundry bags are made of porous material like durable polyester that allows soap and water to pass through while shielding your delicate clothes from damage during the washing and drying cycle. They come in different sizes and can be fastened with zippers, plastic gator clips, rubber or drawstrings.

When Should You Use a Mesh Laundry Bag?
You should use a mesh laundry bag during your laundry routine when you want to launder delicate clothes, activewear or gym clothes, items with straps or embellishments, or when washing baby clothes.
Washing Delicate Clothes
Use a mesh laundry bag as a hack when washing delicate clothes made of silk, wool, nylon, or lace as they can stretch or snag in a washing machine. These items usually require dry cleaning or a hand wash. However, you can use a garment bag to clean these items and protect them from damage during the washing cycle.
People also put items such as undergarments, swimsuits, and hosiery in a washable laundry bag and use the delicate cycle on the machine while washing these garments.
Washing Activewear or Gym Clothes
Gym clothes or activewear are generally made of polyester or nylon which is durable. However, they might have zippers or string-based fasteners that can get caught in the agitator or drum of the washing machine during the cleaning cycle. Therefore, it is best to place this wash in a laundry bag before running the washing machine.
Washing Items with Straps or Embellishments
Clothes that have beads, sequins, or other decorative work done on them generally need to get a hand wash or be dry cleaned, which can be expensive. However, if the care label allows machine washing, make sure to place these items in a mesh bag to prevent them from catching on to other items or falling loose into the washing machine.
Bras and lingerie that are made of soft material are also prone to damage if placed in a washer. Fastening all hooks before placing them into a wash bag is better. This prevents them from attaching to the other clothes.
Washing Baby Clothes and Small Items
Baby clothes and small items like socks are likely to get lost during the washing process. It will save you a lot of time and frustration if you place these items in a mesh bag so that they are in one place during the washing cycle.

How Should You Choose a Mesh Laundry Bag
Some things need to be considered while you are on the lookout for a laundry bag. These include the type of material the bag is made of, the available sizes, the fastening that has been used, and whether the mesh bag offers a dryer-safe environment for the clothes.
Type of Material
Most mesh laundry bags are made of polyester or its variants. The decision is about whether you need a tight weave bag or an open mesh – a tighter weave will give more protection than an open mesh.
Type of Fastening
Mesh garment bags come with a variety of fastenings, such as zippers, drawstrings, plastic gator clips, and cinch locks. Drawstrings are liable to get tangled in the wash. Plastic gator clips or cinch locks can bounce and knock around on the inside of your washer. They create noise and may even break in a high-efficiency washer when it is put on high spin. Zippers are more reliable and secure, however, you have to ensure that it has a sleeve for the zipper head. This will reduce the chances of it snagging when put in the wash.
Sizes Available
Depending on the manufacturer that you choose, there are a variety of sizes available. It is recommended to buy mesh bags in several different sizes rather than go for a single large one to give you the flexibility to use the size that is relevant for the wash load and the number of clothes that you want to place in the mesh bag.
Dryer Safe
The best garment bags to choose from are the ones that are dryer-safe. This means that they are heat resistant and can withstand the pressure of a dryer while protecting the clothes.

Using a Mesh Laundry Bag: A Step-By-Step Guide
This section is a guide on how to best use a mesh laundry bag during washing time. You will need to do the following.
1. Sort and Load the Clothing Items
The first step is to sort out the clothes into categories such as whites, colored fabrics, and delicate items. You can then choose which items to place in the mesh bag.
2. Secure and Close the Mesh Bag
The next step is to make sure that all the delicate clothes have been placed in the mesh bag. Secure the mesh bag by closing the zipper, drawstring, or clip. Make sure that the bag has not been filled too tight and that it has been closed securely to prevent it from opening up during the washing and drying process.
3. Place It in the Washing Machine
This is the last step in the process. Load the clothes that don't require a mesh bag into the washing machine at the bottom. Then, place the mesh bag on top and start the washing cycle. Remember it is better to air dry rather than tumble dry your delicate clothes.

Protect Your Clothes With Rinse
If you have to wash delicate or baby clothes regularly, it is best practice to protect them during this process and ensure their longevity. Putting them in a mesh bag and using a soft detergent like Woolite will prevent color bleed and keep your clothes looking fresh after every wash.
However, if you do not have the time or want someone else to take care of keeping your clothes in top condition, try a professional laundry service that knows all about protecting your clothes while washing them, such as Rinse.
Check out our wash & fold, dry clean, and hang dry services that will save you the effort of dealing with your laundry every week. The best part? We come pick up and then deliver your clothes, right to your front door.
Contact us at Rinse today to see our skill in action.

This article delves into the effective utilization of lemon juice, vinegar, and baking soda for cleaning various areas of the house and household items. It underscores the significance of adopting sustainable and homemade cleaning methods.
Introduction
With a major part of our waking hours at work, finding time to clean the house can be difficult. If it can't be done immediately or requires too much effort, we tend to put it off till the weekend. When that time comes, we tend to use store-bought products to clean, right?
However, the existence of chemicals in many cleaning materials can be a cause for concern, as they can be toxic and hazardous to health. As a result, many people have started to move on to using natural ingredients such as lemon juice, baking soda, and white vinegar as they are natural ingredients. They are easily available, are highly effective as cleaning products, and promote sustainability while reducing one's carbon footprint.
In this article, we will discuss how to use lemon juice, white vinegar, and baking soda to clean clothes as well as different areas around the house. These homemade ingredients can freshen up our homes, save on costs, and promote sustainability.
Cleaning with Vinegar
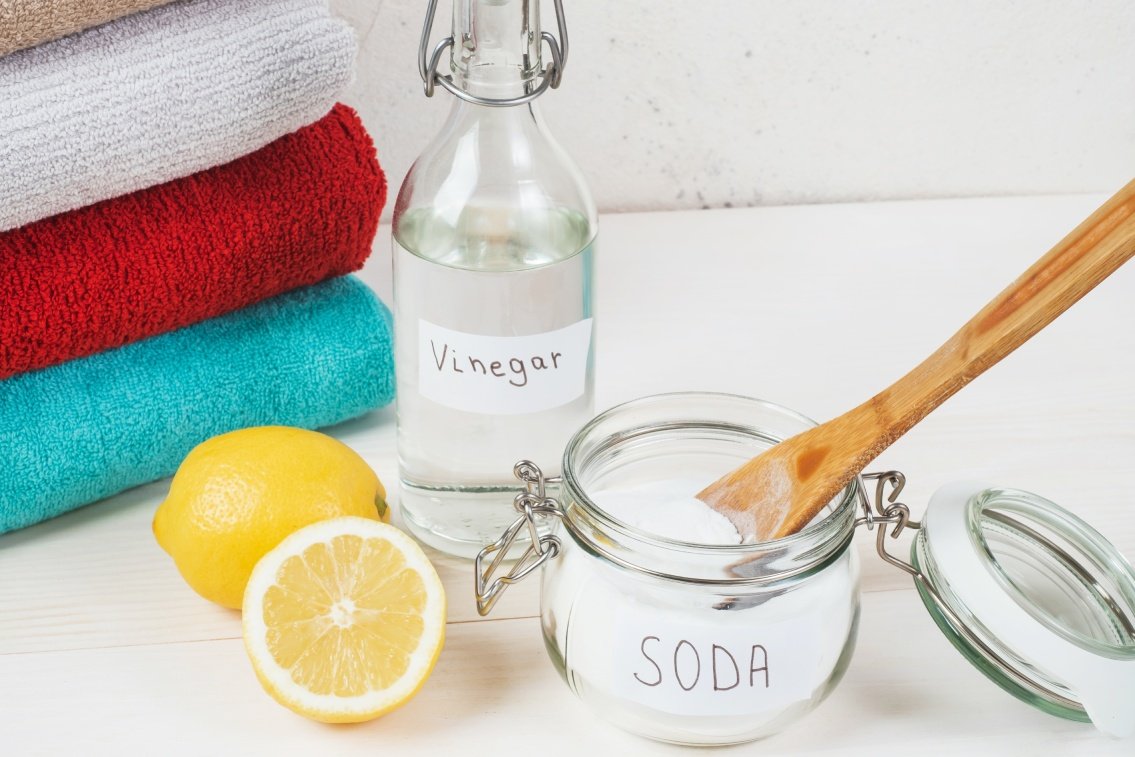
Cleaning vinegar is available at most grocery stores. It can be used to clean surfaces and household utensils and is made from distilled corn or grain. It contains 6% acetic acid so it should be used with gloves. Compared to this, distilled white vinegar has 5% acetic acid and can be used to clean most surfaces and utensils without any health consequences. You can use it to remove stains, eliminate odors, and as a natural disinfectant. Below we dive into some useful applications:
Cleaning Toilets and Sinks
White vinegar can be used to clean bathroom toilets and sinks. To achieve this, you have to fill the sink with a few inches of hot water and add one or two cups of white vinegar. Wait for around ten minutes and wipe clean. The mixture of water and vinegar will cut through the grime and soap scum and make your sink look sparkling clean. You can also use it to clean out your drain and unclog it as well.
As a Fabric Softener
White vinegar is a natural fabric softener. It can be used as a safe alternative for people who have sensitive skin issues. To do this, you just have to add half a cup of vinegar to the washing machine before the rinse cycle.
Cleaning Kitchen Stoves
Put a few drops of white vinegar on the surface of the greasy kitchen stove. Let it sit for five minutes. Then, you can scrub off the dirt using a soft cloth. You can use dishwashing liquid if the grease has not been removed effectively. You can also use vinegar to clean any kind of surfaces in the house, from kitchens to living rooms.
Cleaning with Baking Soda
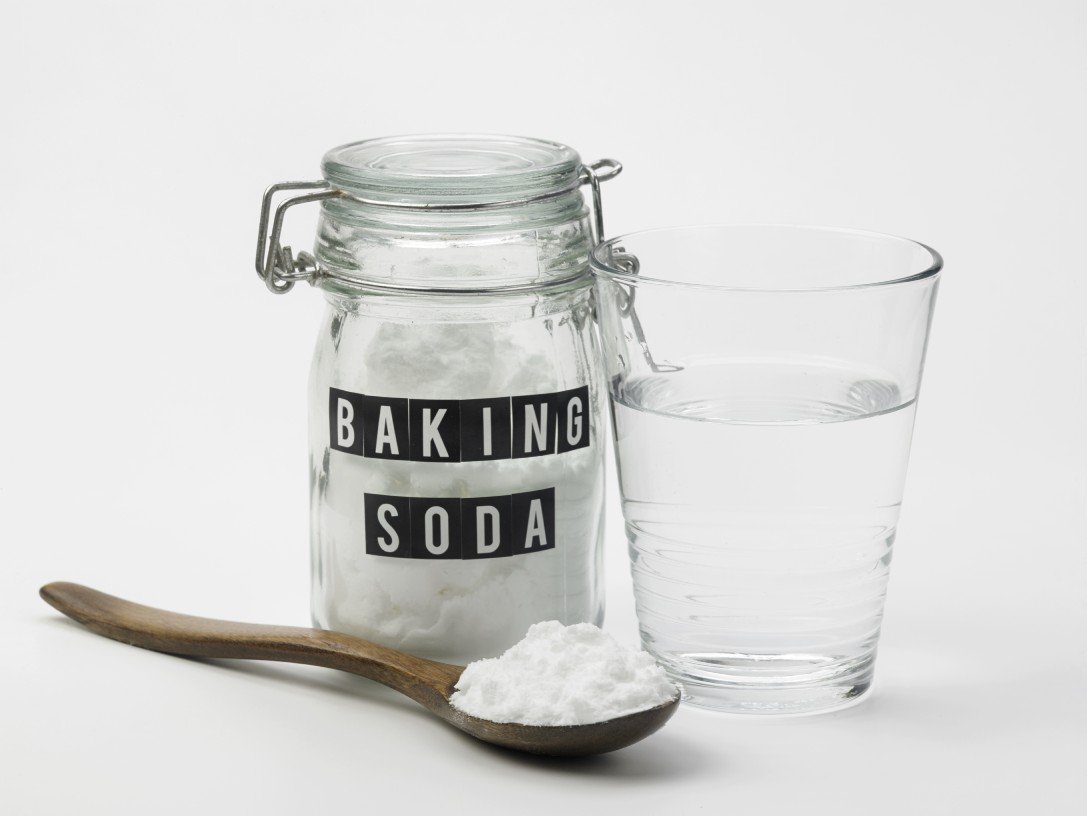
Baking soda is another effective natural cleaning agent. It is a mild abrasive and can be used to clean surfaces, scrub floors, and clean other household items. It neutralizes odors and can also be used to clean ovens and remove stains on clothes. You can even use it to remove mildew stains.
Stain Removal in Clothes with Mildew
To use baking soda as a stain remover, you will have to mix a quarter tablespoon of baking soda in a quart of water and mix them thoroughly. It is recommended to put it in a spray container so that it can be sprayed on the affected areas. Wait for five minutes, and then rub the affected area with a scrubbing brush to get rid of the stains.
As an Oven Cleaner
Mix half a cup of baking soda with three tablespoons of water to use baking soda as an oven cleaner. Then, you can spread this solution in the oven. Wait for 15 to 20 minutes before you wipe it clean. Be careful to avoid the heating elements. To clean the interior of the oven, it is recommended to use a three-to-one mixture of baking soda and water. Then, wipe it clean with a damp cloth.
As an Odor Neutralizer
Baking soda is a natural deodorizer. To get rid of the nasty smell from utensils and other items put a mixture of baking soda and water in an empty spray bottle. Spray the items that you want deodorized and leave them overnight. Then, rinse thoroughly and clean with dishwashing liquid. End by wiping with a sponge.
For Hairbrushes and Combs
You can also use baking soda to clean hairbrushes and combs. Make sure to remove the hair before immersing the items in a solution of baking soda and water. Then let it soak for 30 minutes. Wash it out thoroughly with water before using them again.
Removing Crayon Marks
A mixture of baking soda and water is also effective in removing crayon marks from walls. Just dip an old toothbrush and spread it over the affected area. You can then wipe it off with a cloth.
Cleaning with Lemon
Lemon juice can also be used as a cleaner for household items. Its acidic properties make it effective for cutting through grease. It can be used to remove old stains on clothes due to its natural bleaching properties. It also replaces unpleasant odors with a natural scent.
As a Natural Bleaching and Brightening Agent for Clothes
An effective natural bleaching agent, mix half a cup of lemon juice with one cup of water and use it in the washing process instead of your regular bleach.
As a Pre-Treatment for Stains
Lemon juice can also be used to remove rust stains and armpit stains. To do this, you would first have to sprinkle some salt on the affected area. Pour some lemon juice on the item and leave it to dry in the sun. Then you can wash off the stain as you would normally with soap or detergent.
To Clean Glasses
To use lemon juice to clean drinking glasses, mix three tablespoons of lemon juice with one cup of water. Then put it in a spray bottle and spray on and in the glasses to clean them. Rinse off with normal dishwashing liquid and water to complete the process.
To Polish Furniture
Lemon juice can be used to polish hardwood furniture. Just mix half a cup of lemon juice with one cup of olive oil to create a good furniture polish. You can apply it on the furniture and clean it off a little later after it dries.

Keep Your Laundry Sustainable with Rinse
There is great emphasis on using eco-friendly and sustainable methods to make the planet a better place to live. Rinse is committed to these goals as well. We use eco-friendly detergent, no fabric softener, efficient machines, and cold water in our laundry process. We also prefer air drying rather than using a dryer machine, reducing energy consumption.
If you want to join in the green revolution, choose Rinse. You can contact us by phone, SMS, email, or our mobile app to get started. We even have a Valet service that picks up, washes, and delivers your clothes right to your door!
Contact us at Rinse today to see our skill in action.

This comprehensive guide delves into effective apron-washing techniques for restaurant owners and chefs, aiming to answer common queries and provide practical instructions for maintaining aprons.
Introduction
In the bustling world of culinary arts, an apron is more than just a piece of fabric; it's a chef's armor against the spills and splatters of the kitchen. For both home cooks and professional chefs, a clean apron is not just about appearance; it's a testament to hygiene and professionalism.
Proper apron care involves tackling everything from grease stains to flour dustings, ensuring that your crisp white apron or sleek black apron remains spotless and functional.
Below, we'll dive into the art of washing aprons, offering step-by-step instructions and tips for home and professional use. We'll explore how to effectively use stain removers, vinegar, and even baking soda to tackle different types of stains.
But it's not just about removing stains; it's about maintaining the integrity of the garment. We'll discuss how to wash aprons in a washing machine without causing tangles or damage. Techniques such as using a laundry bag, soaking in warm water, and the right way to rinse and dry your apron will be covered.
From choosing the right dishwashing soap or detergent to understanding when to use bleach or lemon juice, this guide ensures your apron – be it your favorite custom apron or a standard kitchen apron – remains an impeccable part of your uniform.

How Often Should I Wash My Aprons?
The frequency of washing an apron largely depends on its use and exposure to stains and messy kitchen activities. Daily washing might be necessary for a professional chef or someone who wears an apron regularly in a bustling kitchen. Stains, especially grease stains, can quickly accumulate on a kitchen apron, turning a once-pristine apron into a patchwork of splatters.
If you are not using your apron that often, it is recommended to clean it whenever it looks visibly dirty or stained. Otherwise, it is perfectly acceptable to store it after a light use.

How to Wash an Apron (And Keep Strings from Tangling)
Washing an apron correctly is crucial for maintaining its appearance and functionality, especially in professional kitchen settings. Here's a step-by-step guide on how to effectively wash an apron and prevent the strings from tangling:
-
Pre-Treat Stains: Before tossing your apron into the washing machine, inspect it for any stains. Use a stain remover or a mixture of baking soda and vinegar to pre-treat grease or food stains. Gently blot or rub the affected area with the solution, then let it soak.
-
Prepare for Washing: Place your apron in a mesh laundry bag or pillowcase to prevent strings from tangling. This is especially useful for kitchen aprons with long strings or custom aprons with delicate details. For a white apron, you might consider using bleach; however, for colored or black aprons, stick to color-safe detergents.
-
Select the Right Washer Setting: Place your apron in the washing machine, selecting a gentle cycle with warm water for cotton aprons or cold water for synthetic fabrics. Adding a mild dishwashing detergent or liquid laundry soap is recommended.
-
Washing Process: Start the wash cycle. For white aprons, you can add white vinegar to the rinse cycle as a natural fabric softener and odor remover. This step helps maintain the clean, fresh smell and uniform appearance of the apron.
-
Drying: After washing, rinse thoroughly and remove the apron from the mesh bag. You can either dry it in the dryer on a low heat setting to prevent wrinkles or air dry it for a more gentle approach.
-
Post-Wash Care: Once dry, if there are any remaining wrinkles, lightly iron the apron on a suitable setting for its fabric type.

Should I Put Aprons in the Dryer?
The suitability of using a dryer for aprons depends on the fabric type. While most cotton and synthetic aprons can be safely dried in a dryer, it's essential to use the correct settings. For cotton aprons, use a lower heat setting to prevent shrinkage and wrinkles. However, for delicate or custom aprons, air drying is recommended.
If using a dryer, remove the apron promptly after the cycle to reduce wrinkles and preserve the fabric's quality. Aprons with embellishments or made of sensitive materials should be air-dried to avoid damage. Hang the apron on a drying rack or lay it flat to dry naturally. This method not only prevents possible heat damage but also helps maintain the apron's shape and eliminates any residual smell.

How to Get Stains Out of Aprons
Chefs' aprons often fall victim to various kitchen stains. Knowing how to tackle these effectively is key to maintaining a clean, professional appearance. Here's a guide to removing common stains from aprons:
1. Grease Stains
To remove grease stains from an apron, apply dishwashing soap directly to the stain. The degreasing properties of the soap help break down the grease. Let it soak for a few minutes, then gently blot and rub the affected area before washing.
2. Wine
Wine stains can be treated with white vinegar or lemon juice. Apply either liquid to the stain and let it sit for several minutes. Rinse with cold water, and then wash as usual.
3. Coffee
For coffee stains, mix a solution of equal parts vinegar and warm water. Apply this solution to the stain, let it soak, then rinse and wash the apron.
4. Chocolate
Remove chocolate stains by first gently scraping off any excess. Then, apply a mixture of dishwashing detergent and warm water to the stain, rub gently, and rinse.
5. Tomato Sauce
Apply white vinegar directly to the tomato sauce stain, let it soak for a few minutes, then wash the apron in warm water.
6. Blood
For fresh blood stains, rinse the apron under cold water. Apply hydrogen peroxide or lemon juice to the stain, then blot and wash in cold water.
7. Ink
Ink stains can be treated with rubbing alcohol. Apply it to the stain, let it sit for a few minutes, then blot and wash.
8. Curry
Curry stains should be treated with a paste of baking soda and water. Apply it to the stain, let it dry, then brush it off and wash the apron.
9. Mustard
Apply a solution of dishwashing soap and warm water to the mustard stain. Let it soak, then rinse and wash.
10. Oil-Based Dressing
Treat oil-based dressing stains with dishwashing soap. Apply it directly, rub gently, and then wash in warm water.
11. Berry Juices
Berry juice stains respond well to boiling water. Stretch the stained area over a bowl and pour boiling water through the stain from a height, then wash normally.
12. Burned Food
For burned food stains, soak the apron in a solution of laundry detergent and warm water before washing.

Simplify Apron Care for Your Restaurant with Rinse
For restaurant owners and chefs, maintaining a pristine kitchen apron can be a daunting task. Rinse offers a seamless solution to this challenge. Our specialized laundry and dry cleaning services effectively wash and clean your aprons, ensuring they are free from stains and odors. Whether it's removing tough grease with dishwashing soap or tackling stains with stain remover and vinegar, we handle it all.
Our process involves pre-treating affected areas, soaking in water as needed, and using the best dishwashing detergent for the fabric type. Every chef’s uniform is returned smelling fresh, with no trace of the bustling kitchen environment.
Choose Rinse to wear your kitchen apron with pride, knowing each stain and dirty spot has been expertly blotted, rinsed, and washed. Let us take the laundry burden off your hands so you can focus on what you do best – creating culinary masterpieces.
Contact us at Rinse today to see our skill in action.
Topics
Rinse Drop
We offer pickup and delivery if you can’t be present between 8pm and 10pm.
Our Valet will pick up or deliver your order to your doorstep or concierge, at which point you’ll receive a text with a photo showing where your items were left.
You can enable Rinse Drop on any (or all) of your orders.

