Care
Clothing care tips to make your wardrobe last

All clothes have unique makeup, including different types of clothing dye. Find out why clothes bleed, how you can limit it, and what to do if they have bled.
Introduction
Contrary to popular belief, color bleeding is not more common for a particular color. However, there are steps you can take to ensure that all your clothes come out clean, intact, and without the need for a rewash. Below we’ll discuss why colors bleed and share ways you can avoid it.
Why Do Clothes Color Bleed?
More often than not, garments color bleed simply due to the type of dye commercial clothing manufacturers oftentimes use when making colored clothes. The dye is called direct dye and it is available in many colors, which are equally as susceptible to color bleeding. However, it’s commonly used with red-colored clothing items. Therefore, red-colored clothing is associated (unfairly!) with color bleeding more than other colors.
Garments with red direct dye are much more likely to color bleed in the laundry as opposed to clothes that use fiber-reactive dye. This is because of the chemical makeup of direct dye and it reacts with the fibers of the clothing.
Red color bleeding also can be a result of over-dyeing or the dye not being properly settled in the fabric of the clothing.

Getting Color Bleed Out of Clothes in 5 Simple Steps
You take out a laundry load and are shocked and devastated to see some of your favorite clothes have color bleeding. What should you do? Use the below 5 tips, that's what:
Separate Affected Garment
The first thing is to take the item(s) that has been affected and NOT place it in the dryer or hangline. It is extremely difficult to remove the bleed once the piece dries.
Check Care Labels
We will be running another washer load with all the affected items, but first, check the care labels on each item. They sometimes warn that the garment is prone to bleeding and / or has special washing instructions. Note that new clothes are more prone to bleeding.
Pre-Treat the Stain
The next step will be to work on the affected spots before putting them in the washing machine. You might have a stain remover you trust or can try the following technique using regular laundry detergent:
-
Fill a sink or tub with 1 gallon of water
-
Add 2 tablespoons of detergent to the stained areas
-
Use a brush to scrub the stain
-
Allow the garment to soak for 30 minutes before a regular cycle in the washing machine
Wash with Like Colors
Run the washing machine but ensure that whites and colors are properly separated.
Inspect and Repeat If Necessary
Take out your clothes from the washer and check the affected items. If the stain is gone, awesome! If it's still there, don't panic. Instead, try the below alternatives.

Alternative Wash For Stubborn Stains
Oxygen Bleach
Now, if you tried the above and it did not work, it's time to move to something more powerful: oxygen bleach. Note this chemical works on both whites and colors (again, check the label!).
-
Fill a tub with 1 gallon of water and mix 1 cup of oxygenated bleach.
-
Soak the item for 30 minutes
-
Rinse the clothes with cold water
-
Place the garment back in the washer and run a normal cycle load
-
Fill the tub with another gallon of water and 1 cup of bleach
-
Soak your clothes for another 30 minutes
-
Rinse them with cold water
Hydrogen Peroxide
Another chemical you can try is hydrogen peroxide. Before getting started, however, you will need to do a colorfast test. Dampen a cotton ball with hydrogen peroxide and rub or blot it at the back of your item's seam. If any color is transferred to the cotton ball, do NOT proceed.
Otherwise, here are the steps:
-
Mix 3 cups of water with 1 cup of hydrogen peroxide in a container
-
Fill a sink with water and add your solution
-
Place the affected garments in the sink and let them soak for 8 hours
-
Rinse with cool water

How Do I Avoid Color Bleeding?
Unless you are making your own clothes or dying your own clothes it’s difficult to know much about the dye used on your clothing items.
With that said, there are a few best practices you can follow regardless of the type of dye to limit your chances of experiencing color bleeding on your next laundry day.
-
Always separate lights and darks. This is a mandatory practice at Rinse but you may be surprised to know that many people at home overlook this important step when doing their laundry.
-
Use a color fixative such as Retayne or Raycafix on your clothes pre-wash to help prevent color transfer.
-
Use cold water over hot water when washing. Hot water can loosen up the fabric and increase the likelihood of color bleeding.
-
When possible, adjust your washer settings to delicate or something similar to reduce the amount of friction inside the washing machine.
-
Add color catcher sheets to the machine to help catch and hold dyes during washing.
-
Turn your clothes inside out to reduce both color fading and color bleeding.
As you can see there are several steps you can take to help reduce the chances of color bleeding. By implementing these basic tips you’ll not only limit color bleeding but improve the lifespan of your clothes.

Say Goodbye to Color Bleed with Rinse
There is one last technique we'd like to share when it comes to preventing color bleeding: using a professional laundry service, such as Rinse. We have years of experience cleaning all types of garments and their respective dyes.
Our team of professional cleaners knows how to tackle even the toughest stains and how to wash your clothes to make sure bleeding does not happen.
In addition, we offer the ultimate convenience for your laundry day – we pick up and deliver your clothes to your doorstep, 7 days a week. Not only can you rest easy knowing your clothes are in the care of experts, but you will save precious time by choosing Rinse for your clothes and their color care.
Contact us at Rinse today to see our skill in action.

Have laundry or dry cleaning to do?
Rinse picks up, cleans and delivers 7 days a week. Amazingly awesome. Ridiculously simple.

Learn how to take care of your denim with Rinse!
Maintaining your denim is entirely dependent on what you do when it comes to cleaning the garment. Sometimes it's best to have your favorite pair of jeans cleaned professionally, maybe even dry-cleaned. Other times, you can take care of them at home, either hand washing or with your washing machine. But how often should you wash them? How do you pick the cleaning method? What happens when you don't clean them? Read on to find the answers to these questions!
How Often Should You Wash Your Jeans?
Before we give you our top tips on how to take care of your favorite denim, let's talk about the frequency with which you should wash your dirty jeans.
It is a bit of a laundry myth that jeans need to be washed as often as most people do – some report tossing them in the washer every week or after 3-4 wears.
The truth is that washing your jeans that frequently and constantly exposing them to detergent, water, spinning, and heat from the dryer wears the fabric down, causing fading and risking shrinkage.
We recommend cleaning your denim when one of the following happens:
-
It gets dirty (stains, dirt, odors)
-
It has been 2 months since the last wash
5 Best Ways to Wash Jeans
Now that we know when to clean them, let's talk about how. As mentioned above, there are several ways to clean your denim, each with pros and cons. Here are the 5 you should know about:
Professional Cleaners
The pros:
Professional cleaners have – as expected – a lot of experience cleaning jeans. They follow the individual garment care label instructions. The care labels usually have water temperature and drying heating settings, which pro cleaners should follow on an individual garment basis.
While you can follow the care label carefully yourself, the big difference is that a high-quality cleaner like Rinse is trained to recognize and treat stains of all types.
If you want to truly keep new jeans looking in top shape, take them to dry clean – this eliminates any risk of seeing them shrink or fade.
Before washing your jeans, most dry cleaners will go through a step called “pre-spotting,” where they give attention and treatment to individual stains. For best results, it’s helpful to tell the cleaner what type of stain is on your jeans. The cleaners will use specific solvents and cleaning techniques to get rid of those stains, which is a step that isn't done when you are relying on a washing machine to remove stains.
The cons:
The only downside of professional cleaning is the price, which is not to be overlooked since costs can accumulate if you're cleaning multiple pieces.
Our recommendation is to bring your jeans to a professional cleaner when you have a stain that needs treatment. If your denim is stain-free, it makes more sense to wash your denim yourself via the laundry and hang dry route.
Hand Washing
The pros:
Using a bucket and some mild detergent is the most gentle way to care for your jeans. If you’re willing to go the extra mile, you can more closely control the outcome of each wash. Hand washing will also reduce the amount of friction applied to your jeans which will help them last longer.
The cons:
The downside to hand washing is that it takes a lot of time and energy, and generates mixed results. Typically hand washing is only as good as how much you are willing to scrub the garment. Each type of stain may require a different cleaning treatment and that makes it difficult to remove every type of stain by using soap and water alone. It may also be difficult to achieve an even clean on the garment.
Washing Machine
The pros:
Using a residential washing machine is the easiest way to clean denim and washing machines do a thorough job so you can be confident that your clothes will come out clean.
The cons:
Washing machines are also the option that is most likely to cause your jeans to deteriorate. The spinning mechanism in a washing machine tends to generate a high amount of friction during the cleaning process which causes both dye loss and fabric deterioration over time.
We suggest the following steps to preserve the life of your denim garments:
-
Use the delicate setting, which is easier on the garment. Reducing the amount of friction the denim is exposed to will help preserve the life of your jeans.
-
Turn your denim inside out.
-
Hang to dry to avoid excess exposure to heat.
All of these steps will help preserve the life of your clothes.
Spot Cleaning
The pros:
Similar to hand washing, spot cleaning involves only targeting the stains on your jeans. This technique will maintain the benefits listed in the hand washing section, along with reduced time and energy required – the area you are cleaning is much smaller.
The cons:
Some stains will be tough to remove and will require different techniques. A stain remover may be required, and you might find yourself repeating the process more than once to achieve the result you seek.
Steam Cleaning
The pros:
This technique involves using a steamer to clean your denim. It is very gentle on the fabric and removes wrinkles or creases too. The steam's temperature also kills bacteria, removing odors in the process. Simply hold the steamer 1-2 inches away from the fabric and work your way down. Spend some extra time on stains and make sure the garment is fully dry before storing.
The cons:
A handheld steamer is a required purchase. In addition, steam cleaning may not remove stains as effectively as more traditional methods. Make sure to check the care label to ensure they are steam-safe and always start with a small area before moving on to the entire garment.
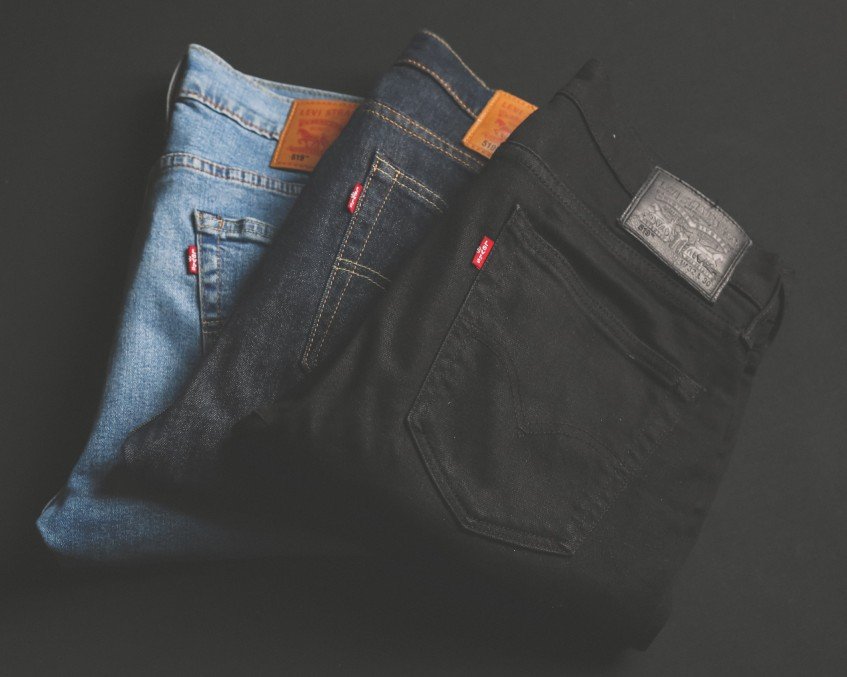
Consequences of Not Washing Your Jeans
Curious to know what happens when you don't wash your denim? Here's the list:
Odor and Bacteria Buildup
You will find your jeans accumulate stains from dirt, food, oil, sweat, and even skin cells. Over time, these stains will become visible and start smelling unpleasantly.
Stubborn Stains
Prolonging a wash for too long results in stains setting in and becoming more difficult to remove.
Skin Irritation and Allergies
With bacteria setting in on the fabric, it is not uncommon to see adverse skin reactions or allergies from dirty jeans.
Reduced Durability
While washing denim too often causes fading and wear, not washing it at all results in excessive wear in high-friction areas, which causes the fabric to deteriorate faster than it otherwise would.

Take the Best Care of Your Jeans with Rinse
Now that you're an expert in caring for your denim, we do have one last tip to ensure your jeans and denim jackets are always in pristine condition – use Rinse to take care of them.
We have years of experience caring for denim, whether it be via our wash and fold or dry cleaning services. You won't have to worry about stains not coming off or the best cleaning technique to employ – we'll do that for you and maintain the quality of your treasured jeans.
But it gets even better – we offer the ultimate convenience through our pickup and delivery service right to your doorstep!
Contact us at Rinse today to see our skill in action.

This article is your ultimate guide to the proper care and maintenance of your prized Lululemon leggings. It will provide readers with expert advice on washing these high-quality activewear items to extend their lifespan and maintain their performance.
Introduction
Whether you use your Lululemon leggings at the gym or home, or you wear them as part of your outerwear rotation, it is important to keep them both clean and in pristine condition.
Since they are made from high-quality fabric and undergo extensive product testing and quality control, they are not cheap. Whether they are Luon, Luxtreme, or Nulu, the synthetic fibers they're made from that allow them to stretch and enable sweat wicking also mean that odors become trapped and therefore need to be washed regularly.
Lululemon's athleisure clothing line is very delicate when it comes to washing. Synthetic fabric is prone to pilling and stretching, and can even shrink if not cleaned following care labels properly. The garments can also see their elastic fibers wear out over time.
But do not worry! We'll provide some tips below on how to wash your Lulu yoga pants or leggings to make sure they are always ready for you.
How to Wash Your Lululemon Leggings
Stain Removal & Hand Washing
While hand washing your Lulus ensures that no damage comes to them during the spinning and other rigors of a machine wash, rest assured knowing they are designed to thrive in a washing machine.
We would only recommend hand washing if you are targeting a specific stain or spot on your yoga pants. If you are doing this, use as little laundry detergent as possible, as excess soap reduces your leggings' moisture-wicking abilities.
Now before running the washer, remember to check the care labels. If you have removed the tear label, you can always find care instructions for your specific garment on lululemon athletica's website.
Preparing the Wash
A general best practice is to separate your laundry. It is best to run a load with just your activewear or workout clothes with similar fabrics. Make sure the load size is not too large and that your clothes will have enough room in the washer. Next, ensure zippers or Velcro are not facing outwards, turn your clothes inside out, and pre-treat any stains that might be tough to remove from your leggings.
Choosing the Proper Water Temperature
We highly recommend washing your prized Lulu leggings with cold water. Not only are most detergents designed to be effective in this temperature, but you also avoid any risk of clothes shrinking or color bleeding. In addition, avoiding hot water is good for the environment and will result in lower utility bills for you, too.
Using the Right Detergent
When it comes to selecting your detergent, most will do the job. However, if you want to be extra careful, you could look for delicate detergents (but again, they are not required).
A great thing about your Lulu leggings is that they do not require fabric softener. We recommend against using it, as it can damage fabrics like Lycra and Luxtreme with a hard-to-remove coating post-wash.
Selecting the Appropriate Washing Machine Setting
The ideal washing machine setting for your leggings and other athletic apparel will be gentle or delicate wash cycle. Avoid risking damage or wear on the clothing fibers by always using this cycle setting.

Proper Drying
Drying is where a lot of Lululemon items get damaged. A best practice is to avoid the dryer and always flat dry or hang dry. If you are in a rush and this is not feasible, then you can place your leggings in the dryer but use the most gentle, low-temperature tumble dry option (remember heat is not good for fabrics like Lycra).
Storage
This one isn't as important, but it is best to store your Lululemon leggings folded in a drawer. Ideally, you stack them together so like-fabrics on top of each other prevent pilling. This recommendation also holds for traveling and packing a suitcase.

What Not to Do: Washing Mistakes to Avoid
We have covered how to wash, now let's go over what not to do with your beloved yoga pants:
-
Excessive heat: As we mentioned above, your Lululemon garments do not need heat – this goes for water when machine washing and air when machine drying.
-
Using additional cleaning chemicals: We covered fabric softener above, but we mean it when we say all you need is laundry detergent. Keep your Lululemons away from bleach or other chemicals. This holds if you are hand washing, too.
-
Washing with abrasive items: We have alluded to this above, but we cannot emphasize how important it is to avoid having your leggings spinning in the washer with items like towels / terry cloth, denim, or Velcro. It doesn't hurt to place your leggings in a delicates mesh bag for extra protection.
- Leaving damp clothes in the washing machine: Remove your athleisure from the washer as soon as the load is done to avoid bacteria and mildew from setting in.

Activewear Care with Rinse
Well, there you have it! Follow this guide closely and you will keep your Lululemon leggings ready for your next yoga class, workout, or walk in the park.
There is one last tip we can share to ensure quality cleaning and care for your athleisure – use a professional laundry service, like Rinse. We have years of experience cleaning prized garments such as Lululemon leggings.
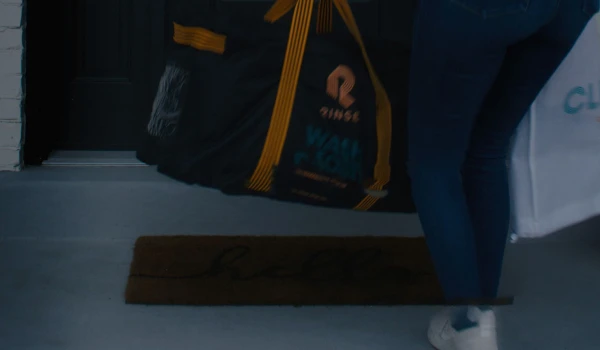
The best part – we offer the ultimate convenience for your laundry needs by offering pickup and delivery services to your doorstep, all 7 days a week. All you have to do is place your clothes in a Rinse bag and leave it at your door – you don't even need to be home!
Contact us at Rinse today to see our skill in action.
Image Source: lululemon athletica inc.

Introduction
Discovering old stains on your favorite clothes can be disheartening, but fear not – there's a solution! Embracing life's messy moments often leads to accidental spills, whether wine, coffee, paint, or cooking mishaps. However, neglecting those stubborn stains can affect your garments' longevity.
This guide will delve into practical solutions, providing a material list and a comprehensive overview of various stain types. Fortunately, we know how to get old stains out of clothes. Learn the secrets to revive your clothing and bid farewell to those persistent marks. Say goodbye to stains and hello to a wardrobe that stands the test of time!
Types of Set-In Stains
Discovering set-in stains can be a headache, but fear not – each stain has its nemesis. Explore six common culprits and understand why banishing them, including how to get white stains out of clothes, poses a unique challenge.
Coffee Stains
For coffee enthusiasts, spills are almost inevitable. Those stubborn brown spots may seem tricky but fret not. Act swiftly by blotting up excess coffee and concocting a mixture of warm water, dish soap, and white vinegar. Employ a clean white cloth to blot the stain gently with this solution.
If time slips away, use warm water to loosen the dried coffee first. Coffee stains are notorious for their deep pigmentation, making quick attention crucial.
Oil-Based Stains
Dripped salad dressing on your cherished shirt? Or are you wondering how to get stains out of white shirts? Oil stains pose a common challenge, but there's a remedy. Begin by absorbing as much grease as possible using powders like baking soda, baby powder, or cornstarch. These powders work by encapsulating the oil, facilitating easier removal during a regular cycle in a washing machine.
The composition of oil-based stains necessitates prompt intervention, as delaying treatment can embed the oil deeper into the fabric fibers.
Wine Stains
Accidental spills during a delightful evening can lead to unwelcome wine stains or red wine stains. Tackling these requires a different approach. You can quickly blot the stain with a clean cloth, avoiding rubbing, which can worsen the situation.
Follow up with cold water and salt for a preliminary treatment. With their vibrant hue and tannin content, wine stains demand immediate attention to prevent setting.
Ink Stains
From accidental child artistry to pesky pen leaks, ink stains are common. Combat them by applying plain white toothpaste to the mark and vigorous rubbing to lift the stain. Alternatively, rubbing alcohol and homemade pastes are effective solutions. Ink stains, due to their diverse chemical compositions, require tailored methods for optimal removal.
Blood Stains
From skinned knees to shaving nicks, blood stains are a persistent challenge. Swift action is paramount, as dried blood can leave a lasting mark. Soak the stain for five to ten minutes using a solution of one cup white vinegar to two cups warm water.
Dab away the blood, recognizing that the hemoglobin in the blood makes it one of the toughest stains to eliminate.
Pigment-Based Stains
These stains, stemming from various sources, may require customized approaches. Whether artistic endeavors or accidental spills, pigment-based stains demand careful treatment. Please be aware of the nature of the pigment and choose the appropriate stain-removal methods.
In the battle against set-in stains, understanding their unique compositions and employing tailored remedies is key. Remember, timely intervention with the right solutions can salvage your favorite garments, whether coffee, oil, wine, ink, blood, or pigment-based stains.

Stain Fighting Materials List
Equipping yourself with the right tools is half the battle when conquering stubborn stains. Here's a curated list of essential materials, ingredients, and tools that will turn you into a stain-fighting pro:
-
Detergent: A staple in any laundry arsenal, detergent is your go-to for breaking down a wide array of stains. Opt for a versatile detergent suitable for various fabric types.
-
White Vinegar: A multi-purpose wonder, white vinegar is effective against various stains, including coffee and blood. Its acidic nature helps break down stains and brighten fabrics.
-
Hydrogen Peroxide: This mild bleach alternative is excellent for combatting tough stains like wine. It acts as a gentle yet effective stain remover without compromising fabric integrity.
-
Baking Soda: This household hero isn't just for baking. Baking soda is a powerful absorber, making it ideal for tackling oil-based stains. Sprinkle it on stains before washing to enhance the cleaning process and remove stains.
-
Soft Brush: A soft brush is handy for delicate fabrics or stubborn stains requiring extra scrubbing. Gently work stain-removing solutions into the fabric without causing damage.
-
Stain-Removal Pen: Compact and convenient, a stain-removal pen is perfect for on-the-go stain emergencies. Keep one in your bag or car for quick and efficient spot treatments.
-
Towels: An essential component of the stain-removal process, towels are crucial for blotting and absorbing excess liquids. They prevent the stain from spreading during treatment.
Cautionary Note: When using DIY stain removal, you should be careful when you mix ingredients. Some combinations can produce harmful reactions or damage fabrics. Always follow recommended ratios and guidelines for safe usage. If you need more clarification, please feel free to refer to product labels or seek professional advice. Safety first ensures successful and risk-free stain removal.
Armed with these stain-fighting essentials and some know-how, you'll be well-equipped to tackle unwanted spots on your favorite garments.

5 Techniques To Get Old Stains Out Of Clothes
Would you be willing to enlist on a mission to restore your garments to their former glory? Here are five potent techniques to bid farewell to those stubborn old stains.
Pre-Treating with Liquid Laundry Detergent
Pre-treating stains is a game-changer; liquid laundry detergent is your trusty ally. Here's a quick guide:
-
Apply a small amount of liquid laundry detergent directly onto the stain.
-
Gently rub the detergent into the fabric, ensuring it covers the entire stained area.
-
Allow the detergent to work its magic for at least 15 minutes, giving it time to penetrate and lift the stain.
-
After the designated time, proceed with your regular laundry routine.
This technique is particularly effective for various stains, from coffee spills to ink marks.
Baking Soda Paste for Stubborn Stains
For those persistent stains that refuse to budge, a baking soda paste is your secret weapon:
-
Mix baking soda with water to form a thick paste.
-
Apply the paste generously onto the stubborn stain, ensuring complete coverage.
-
Let the paste dry on the fabric for approximately 30 minutes.
-
Once dry, brush off the excess paste.
-
Proceed with your usual laundry process.
This method is especially effective for tough stains like grease spots.
Vinegar and Lemon Juice Soak
Harness the power of natural acidity with this dynamic duo:
-
Create a solution by combining equal parts white vinegar and lemon juice.
-
Soak the stained area in the solution for 15-30 minutes, allowing the acids to break down the stain.
-
Rinse the garment thoroughly to remove any residue.
-
Follow up with a standard wash.
This technique is excellent for tackling a range of stains, leaving your clothes refreshed.
Hydrogen Peroxide for Color-Safe Stain Removal
Revitalize colored fabrics with the gentleness of hydrogen peroxide:
-
Apply hydrogen peroxide directly to the stain, ensuring even coverage.
-
To absorb the stain particles that have been released, gently dab the stain with a fresh cloth.
-
Refrain from rubbing too hard to stop the stain from spreading.
-
After blotting, proceed with your regular laundry routine.
Opt for hydrogen peroxide for effective stain removal without compromising colors.
Vinegar and Baking Soda Power Punch
When versatility meets efficacy, turn to this powerful combination:
-
Fill a water bottle with straight vinegar.
-
Completely saturate the stained area.
-
Sprinkle baking soda over the area.
-
Gently rub the mixture into the fabric, reapplying vinegar as needed.
-
Let it sit for a maximum of half an hour.
-
Rinse the stain with cool water for a few minutes.
-
Apply vinegar to the area once more.
-
Pour about a gallon of water into a sink or bucket.
-
Add ½ cup of vinegar and a few tablespoons of laundry detergent.
-
Allow the fabric to soak overnight before laundering.
Enhance your stain-fighting arsenal, restoring spotless allure to your clothes. For optimal results, before widespread application to the garment, remember to test these methods on a small, inconspicuous area. Also, you can always try dry cleaning if the test outcome is not favorable.

Say Goodbye To Stubborn Spots With Rinse
Tired of battling stubborn stains or just want to make laundry easier? Embrace convenience with Rinse, your game-changing laundry solution. Rinse simplifies the fight against set-in stains, offering a time-saving approach for busy individuals. Experience the freedom to say farewell to those relentless spots without the hassle.
Trust Rinse to revive your garments so you can focus on what matters most. Try Rinse today and unlock a new era of spotless style! Visit Rinse now for a stress-free laundry experience and ensure your clothes are properly taken care of.
Contact us at Rinse today to see our skill in action.

Have laundry or dry cleaning to do?
Rinse picks up, cleans and delivers 7 days a week. Amazingly awesome. Ridiculously simple.

This article will discuss the different methods to get grease out of clothes. It will cover the materials the reader will need for each and explain why getting grease out of clothes is so difficult.
Introduction
When it comes to laundry, few things are as horrifying as a grease stain. The moment you see an oil stain, you know it will need a ton of elbow grease and multiple cycles in the washing machine to come off.
Fortunately, there are a few ways to get rid of grease stains from clothes effectively without having to purchase a commercial stain remover.
Your pantry and kitchen are filled with all kinds of ingredients that can help lift the grease off your clothes. In this guide, we'll discuss some methods to remove oily patches, be it cooking grease, motor oil, or even machine grease.

Why Is It So Difficult to Get Grease Out Of Clothes?
You might be wondering why grease stains are so challenging to remove. The reason is that grease doesn't mix with water, which means it will not dissolve in your liquid laundry detergent without a bit of help.
Time for a quick chemistry lesson. Grease is a lipid, which means it is non-polar; meanwhile, water is polar. The difference in polarity means they don't mix well.
As a result, grease clings to your garment instead of being washed away like protein-based stains. This means you need to use ingredients with a higher affinity for grease than water.
Grease also tends to seep into the fibers of your clothing, which makes getting it out even harder. Worry not, though – we'll teach you how to get grease stains out of clothes.
7 Best Methods To Get Grease Out Of Clothes
Most of the methods we tell you below won't require any specialized skill or materials. You'll most likely have these items at home. Let's get right into the methods.
Method 1: Use Dish Soap
We take off with the most ubiquitous material you probably have at home – dish soap. If you've never used it on clothes before, that's not a problem. It's safe for your garments, just as it is for your pots and pans.
The reason dish soap works so well is that it's designed to break down all sorts of oils. That's why it cuts through grease on your dishes and, in this case, clothing.
Here's how to use it:
-
Put your garment on a piece of cardboard or a towel.
-
Cover the stain with a little dish soap.
-
Gently rub the detergent into the stain with your fingers or a toothbrush.
-
Let it sit for 5 to 10 minutes.
-
Rinse the area thoroughly with cold water.
-
If the stain is gone, wash your garment as usual.
-
If the stain is still there, repeat the process or move on to another method.
Time Taken: The entire process should take no more than 15 minutes, depending on how long you let the soap sit.
Method 2: Use Aloe Vera Gel
You're probably surprised to see a skin product on this list. But aloe vera gel works wonders for getting grease out of clothes. It's gentle and non-toxic, so it won't harm your clothes or skin.
Aloe vera contains components of proteins called amino acids. These elements break down the oil in grease, making it easy to remove.
Here's how to use it:
-
Fill the sink or a tub with hot water and soak your garment in it.
-
Take the clothing item out and apply a generous amount of aloe vera gel on the stain.
-
Rub it into the stain by using a toothbrush in a circular motion.
-
Wash the garment as usual.
If you use this method, you should hang or air-dry your garment.
Time Taken: Expect to spend 10-15 minutes on this method.

Method 3: Try Baking Soda
You can use baking soda to remove an oil stain, provided the garment hasn't gone through the washer yet.
Baking soda works best on stains that haven't set yet. It absorbs the oil so the stain does not fully set into your garment's fibers.
Here's how you can use baking soda:
-
Put your garment on a flat surface like a towel.
-
Sprinkle a generous amount of baking soda on the stain.
-
Let it sit for 10-15 minutes. You'll notice a change in the color of the baking soda as it soaks the grease.
-
Once it has dried, scrape the baking soda off your garment.
- Wash your garment with hot water.
If you don't see a color change, repeat the process until you see the stain fade away.
Time Taken: The method takes about 20 to 30 minutes. It may take longer in the case of multiple applications.
Method 4: Make a Cornstarch Paste
Cornstarch isn't just for cooking; it also removes stains, especially those left behind by cooking oil. It also doesn't get stuck to your garment and is a wonderful cleaner for delicate fabrics like suede.
To use cornstarch:
-
Make a thick paste by mixing water and cornstarch.
-
Spread this paste on the stain. Make sure you cover it completely.
-
Leave the cornstarch paste on the garment, waiting for it to dry.
-
Remove excess paste from the garment by brushing it off gently.
-
Wash your garment as usual.
Time Taken: The method can take up to half an hour as the paste needs to dry.
Method 5: Use Chalk
Who knew that good old chalk could remove oil stains? Chalk has absorbent properties that can pull out the oil from your garment.
Here's how you can use chalk:
-
Rub the chalk directly onto the stain, covering it completely.
-
Let it sit overnight.
-
Brush off the excess.
-
Wash your garment in the warmest setting possible using your regular laundry detergent.
Time Taken: The overnight method may take up to 8-10 hours. However, if you're in a rush, you can leave the chalk on for at least 30 minutes before washing the garment.

Method 6: Apply Hairspray
If other cleaners aren't available, give hairspray a shot. The chemicals in hairspray have properties that can lift oil stains.
To use hairspray:
-
Put a towel under the stain so that it does not spread.
-
Spray hairspray on the stain to dampen it completely.
-
Let it sit for about 30 minutes.
-
Wash as usual.
Time Taken: 30 minutes at most.
Method 7: Use Lestoil
For those of you who may not be familiar with Lestoil, it is a heavy-duty cleaner that is commonly used for removing grease and tar stains from the floors. Just a heads up: don't use it on delicate fabrics. Instead, limit this method to durable fabrics.
It's best to do a spot test before using Lestoil on your greasy garment.
-
Use a small brush or your finger to apply the cleaner directly onto the stain.
-
Wash as you normally would.
-
Air dry your clothes.
Time Taken: It takes about 5 minutes.
Want To Keep Your Clothes Grease-Free?
Whether you accidentally get an oil stain on your favorite dress or you're a mechanic who's prone to grease stains, these methods are sure to have your garment looking good as new. However, sometimes, you just don't have the time or expertise to deal with such stains.
Why go through this hassle when Rinse is just a text away? At Rinse, we know how to deal with all kinds of stains, irrespective of the fabric they're on or how tough they've become.
You don't even have to go through the trouble of bringing your greasy clothes to us for washing. We'll pick them up from your doorstep, wash them using eco-friendly products, and deliver them back to you. Simply text us or book a pick-up using our website.
Since we also offer dry cleaning services, we can get rid of that one unfortunate oil stain on your favorite dress or the suit you want to wear to your next important event.
Contact us at Rinse today to see our skill in action.
Image Source: The Clorox Company, Church & Dwight Co., Inc.

Introduction
We've all got that one dirty sneaker or tennis shoe that we promise ourselves we'll clean but never get around to it. Lucky for you, we're here to tell you that shoe cleaning isn't as dreadful as it seems.
Also, clean shoes instantly make you look more put-together and presentable, so it's worth the effort.
If you know the correct method and source the right materials, shoe cleaning shouldn't be a problem, be it a suede pair or running shoes. In this guide, we discuss how to wash your shoes both by hand and in the washing machine. We also provide other helpful tips to keep your shoes looking fresh and new.
What Will You Need To Wash Shoes?
Before you get started, gather the necessary materials. Different types of shoes require different cleaning methods and products. Here's a list of essential items for washing shoes:
-
Gentle Laundry Detergent: It's the basic ingredient for washing your shoes in the machine or by hand. Choose a mild detergent that's suitable for the fabric of your shoes. Avoid using bleach or harsh chemicals that can damage the material.
-
Plastic Tub: If you don't have one, a sink will suffice.
-
Microfiber Cloth: You'll use it to scrub the stains and dirt off your shoes.
-
Soft-Bristled Brush: Opt for a nylon brush.
-
Drying Rack: Since you have to air dry your shoes, a drying rack speeds up the process.
-
Enzyme-Based Stain Remover: It's for those stubborn stains that just won't come off.
-
Baking Soda: Being a deodorizer, baking soda gets rid of any foul odor.
-
Laundry Disinfectant: It kills bacteria and fungi that cause bad smells in your shoes.
-
Laundry Stuffer: You can use newspapers. It's required to keep the shoe's shape while drying.
-
Melamine Eraser: The magic eraser is a must-have for getting rid of scuff marks on white shoes.
-
Dishwashing Liquid: The one in your kitchen will work fine.

How To Wash Shoes In The Washing Machine
Now that you have the required materials, you can start your washing machine and follow these steps to wash your shoes.
Step 1: Check Your Shoe's Label
The label on a canvas shoe will differ from that on a sneaker or suede shoe. Be aware of the material your shoes are made of and follow the instructions on the label.
For instance, sneakers are usually made of polyester, cotton, and nylon. They are more durable, which means you can use a liquid detergent without worry. However, a suede or rubber shoe should be hand-washed.
Step 2: Remove Laces And Insoles
Make sure you take the insole out of the shoe and remove the laces if they are removable.
Step 3: Prep Your Shoes
By preparing your shoes, we mean taking any excess dirt off the laces and insoles. You can use your regular detergent for it. Use a toothbrush or a soft brush to remove the dirt.
Then, put your shoes in a mesh bag. It can be a regular garment bag or even a thin pillowcase. It's a much better approach than letting your shoes toss around inside the washer.
Step 4: Start the Washer
Avoid using hot water to wash your kicks, as it can cause shape distortion and may fade the color, too. Instead, run a slow-spin cycle in cold water. If your washer has a no-spin option, you can use that.
Step 5: Air Dry
Do not dry your shoes in the dryer since the heat warps the glue that holds your sneakers together and causes shrinkage.
Remove the shoes from the bag and take out the laces and insoles. Place them on a clean, dry towel and let them air dry. If you need your shoes to be ready faster, you can use a fan or put them outside in a breezy area. Air drying can take up to 24 hours.

How To Wash Shoes By Hand
If you don't have a mesh laundry bag or don't want to risk using a washing machine, you can also wash your shoes by hand.
Step 1: Prepare The Cleaning Mixture
Prepare a cleaning mixture by mixing a small amount of mild liquid detergent with warm water. Make sure you use a gentle detergent to avoid damaging the material of your shoes.
Step 2: Fill the Tub / Sink
Fill your tub or sink with enough warm water to submerge the shoes. Don't make the water too hot.
Step 3: Soak Your Shoes
Place your shoes in the water and let them soak for about an hour to loosen up any stubborn dirt or stains.
Don't do this with suede shoes, as they should have minimal contact with water. Use a suede eraser or brush for these shoes.
Step 4: Scrub Away Dirt
Scrub away the dirt and stains using a soft-bristle brush. Don't use a harsh brush, as it can damage the material.
Step 5: Rinse
Rinse your shoes thoroughly with cold water to remove any soap residue.
Step 6: Air Dry
Follow the same air drying process as mentioned above in the machine washing method.

Tips For Washing Your Shoes
Here are a few tips to keep in mind when washing your shoes:
-
Material Instructions: Always check the material of your shoes and make sure they are suitable for washing. Some materials like suede, leather, and velvet require special care.
-
Remove Insoles: Take out any removable insoles before washing your shoes. You can clean the insoles separately or wipe them down with a damp cloth. Do the same with the shoelace.
-
Use Baking Soda: Odors, especially in your sports shoes, can be hard to get rid of. Add some baking soda to your cleaning mixture or sprinkle it inside the shoes before washing them.
-
Avoid Direct Sunlight: Do not leave your shoes in direct sunlight to dry, as it can cause discoloration and damage to the material.
-
Pre-Treat Stains: Some stains may require pre-treatment before washing. Use a stain remover or rub some liquid dish soap directly on the stain before washing.
-
Hand Wash Delicate Shoes: If your shoes are made of delicate materials like satin or mesh, it's best to hand wash them instead of machine washing.
How Often Should You Wash Your Shoes?
The frequency of shoe washing will depend on three things: weather conditions, shoe material, and how often you wear them.
-
Weather Conditions: Do you live in a rainy or windy area? You may have to wash your shoes more often.
-
Shoe Material: Certain materials like canvas and mesh are easier to clean and don't lose their shape quickly. So they can be washed more frequently. However, leather and suede should be washed less often to preserve their quality.
-
How Often You Wear Them: If you wear the same shoes every day, they will need to be cleaned more frequently than those worn occasionally.

Keep Your Clothes Clean with Rinse
When you're sorting your laundry, you may see a whole lot of different materials, from silk dresses and nylon running shoes to cotton shirts. And you may wonder, "Can I wash it all together?".
The answer is no. Of course. You'll have to run multiple cycles and follow different washing instructions for each material. And that's just a hassle!
Alternatively, you can outsource your laundry to a cleaning service like Rinse and have us take care of it. Having years of experience in laundry, Rinse professionals know how to wash each material.
While we currently do not offer a shoe cleaning service, we do offer pickup and delivery for all your wash & fold needs. Coupled with additional services like dry cleaning, Rinse is the one-stop solution for all your laundry needs!
Contact us at Rinse today to see our skill in action.

Have laundry or dry cleaning to do?
Rinse picks up, cleans and delivers 7 days a week. Amazingly awesome. Ridiculously simple.
Topics
Rinse Drop
We offer pickup and delivery if you can’t be present between 8pm and 10pm.
Our Valet will pick up or deliver your order to your doorstep or concierge, at which point you’ll receive a text with a photo showing where your items were left.
You can enable Rinse Drop on any (or all) of your orders.


